Define the number of rolls needed for your project
To determine the number of rolls needed:
This result is indicative, if you have any doubts or if you want more details, do not hesitate to contact us by email at contact@maisonmartinmorel.com
or at 0620337425
Preparing the walls
Wallpaper requires smooth, dry and clean walls in order to facilitate installation as well as the resistance of the covering over time.
Find out where to start
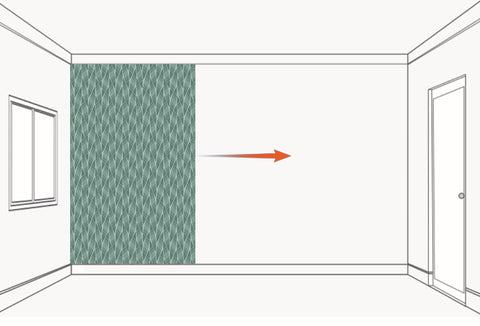
When lining a room, it is preferable to always start the installation with a wall without an opening (door or window) so as to lay an entire strip from the ceiling to the plinth.
If you are right handed, start from the wall to the right of the window. If you are left-handed, start from the wall which is located to the left of the window.
When your wallpaper has a patterned decor, take the time to choose the location of the first strip.
When you have located where to begin installing the wallpaper, draw a vertical line using a plumb line, a spirit level or a laser level to prevent the strip from reference is not shifted as well as all the others.

Cut wallpaper
Measure precisely the height between the ceiling and the top of the plinth, at 2 different places across the width of the strip and add approximately 5 cm to the longest measurement.
Unroll the paper on the table, undecorated side up, then transfer the measurement and draw a line. Cut the first strip with scissors.
When the wallpaper is patterned, remember to align them well to identify the length to cut and to avoid any false connection.

Paste the wallpaper
First, prepare the glue, then let it sit for the time specified on the package.
Place the first strip on a table. Then, apply the glue with a brush: start by gluing the middle of the strip then direct the brush towards the sides until the glue is evenly distributed. Be sure to keep your table clean by wiping off any glue smears with a damp sponge.

The installation of the wallpaper:
Apply the first strip
Place the first strip at the top of the wall, aligning it with the vertical mark. Leave an overhang of about an inch from the ceiling. Then unfold the length to the plinth. Check the correct positioning of the strip, adjust if necessary by sliding it slightly then roll it down.

Cut the overhangs
Use a large spatula and a cutter to cut all of the overhangs. To do this, position the spatula perpendicular to the paper and cut with a cutter.

Lay the other lengths
Lay the following lengths in the same way, making sure to align the patterns.
Remove excess glue with a damp sponge.
